For those of us who love to play with data and aspire to donning the hat of the data scientist, one of the most interesting developments in the Microsoft world over the last year has been the addition of the Machine Learning studio to the long list of services that Microsoft offers through Azure.
The Process:
Azure Machine Learning allows us to take in a set of data, run it through one (or many) algorithmic learning processes and view the results. This would be interesting in and of itself, but it AML goes a step further and gives us the ability to publish the results of these experiments as a predictive web service so we can create applications that take advantage of the data insights we’ve acquired.
We can split the end-to-end AML process into 5 chunks:
- Get the data
- Perform the experiment
- Read the Results
- Deploying as a Web Service
- Using the Experiment
Get the data
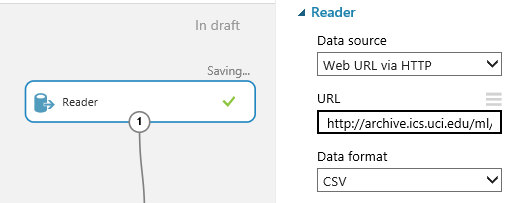
One fun thing about AML is that you can learn how to use the system with some pretty cool real-world datasets. We’ll walk through a letter recognition dataset created for machine learning experiments. That link goes to the page, but the link you’ll need to plug into the AML project is:
http://archive.ics.uci.edu/ml/machine-learning-databases/letter-recognition/letter-recognition.data
Perform the Experiment (Setup)
If you’re not familiar with Azure, you’ll need to do an initial setup to get your Machine Learning space ready. Let’s go to our Azure portal and click on the see the Machine Learning tab on the left
This tab will take us to the Azure Machine Learning space, where we can start our experiment. With the “Experiments” tab selected, click “New” at the bottom left hand corner of the screen.
In the slide-out select “Machine Learning” and “Quick Create”
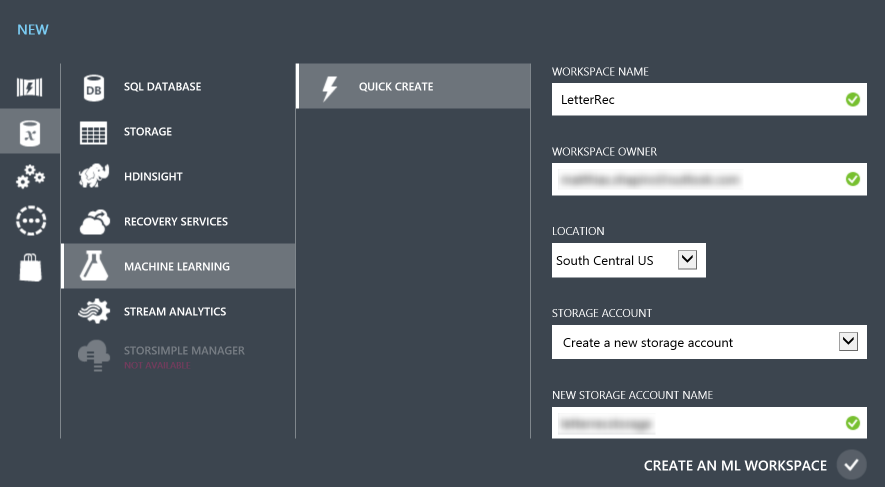
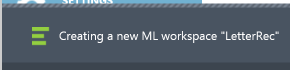
When you click the “Create an ML Workspace” button in the lower right, you’ll see Azure doing its thing as it spins up a new workspace
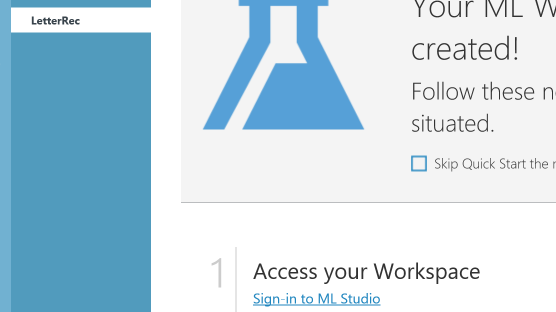
And when you’re done, you’ll see it in your machine learning dashboard
![]()
Clicking on it will take us into the dashboard for that workspace (so many dashboards!) and we can sign in to the Machine Learning Studio, which is where the fun will really happen.
Perform the Experiment
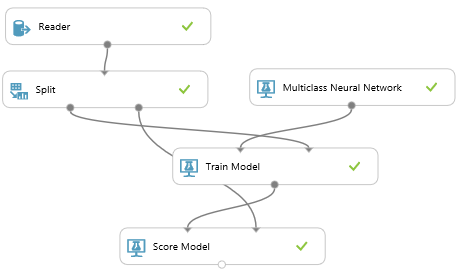
So we’ve opened up our experiment. Azure Machine Learning works by pulling together nodes to do things like read the data, set up an experiment and test the results of the experiment. This will require a data reader, a couple of models to run the data through, and an evaluation of the models.
First, drag in a “Reader” which we’ll use to get the data. You can find it in either the “Data Input and Output Section or by typing “Reader” into the search box at the top. Click on the Reader node and add our data URL from above
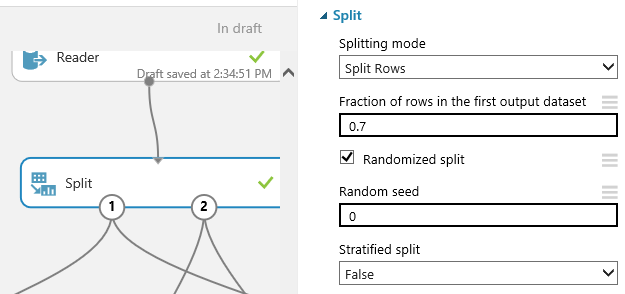
We’ll split this data into 2 sets. The first set we’ll use to train out machine learning models and the second set we’ll use to test our trained models to see how accurate they were. I split the data in a 70%/30% split, which means we’ll use 70% of the data to train our model and then we’ll test that model against the remaining 30% of the data.
Connect the Reader node to the Split node.
For our first model, we’ll use a “Multiclass Decision Jungle”. Drag it and a “Train Model” on to the canvas and connect the MDJ to the Train Model. Connect the first output on the Split node to your Train Model node.
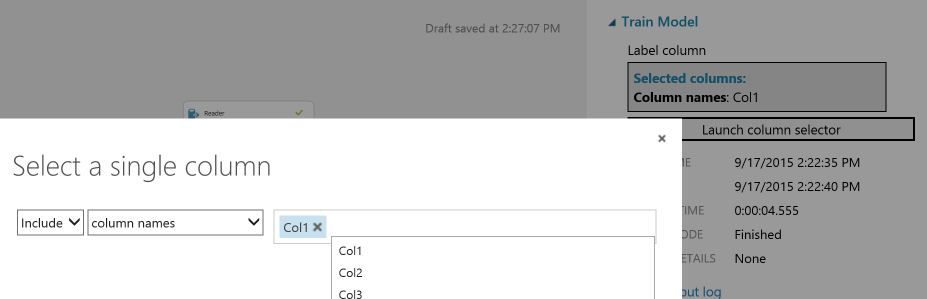
We need to select a column from our data that we want to train the model against. This is the “result” we want… in this case, we want to train the model to recognize the first column (the letter) based on an analysis of the other 16 columns. The problem is that our flow doesn’t know what the data looks like yet because we’ve haven’t run it yet. So let’s run it.
Press the Play button at the bottom. It won’t work, but it will pull the data in and give us the ability to use the automated column selector for the Train Model node. Launch the column selector and choose Col1.
Now we’ll want to score our model against the remaining data. Select a “Score Model” node into the workspace and connect it to the second Split node and the result of the Train Model. We now have the basics of a machine learning flow.

Add a Comparison Model
But we want to test this model against another model and see which one gives us the best results. Let’s use a Multiclass Neural Network. The process is similar to the Decision Jungle… Connect the model to Train Model, connect the data split, score the model just as we did before.
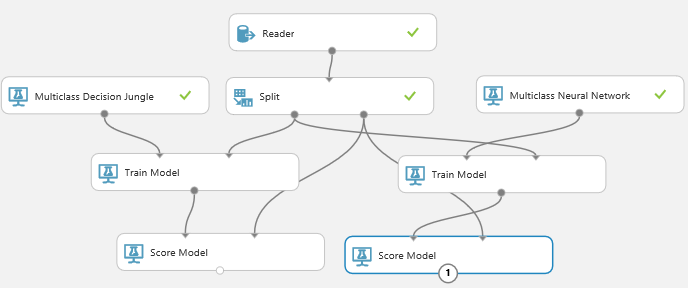
Now we’re ready to evaluate these model, comparing them against each other for accuracy. Drag in an Evaluate Model node and connect the results of the score model to it. Hit the Play button.
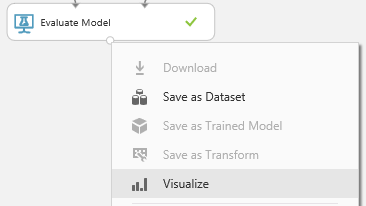
Reading the Results
After the cascade of green checkmarks, we’re ready to see the results of our machine learning model workflow. Click on the output node for Evaluate Model and select “Visualize”
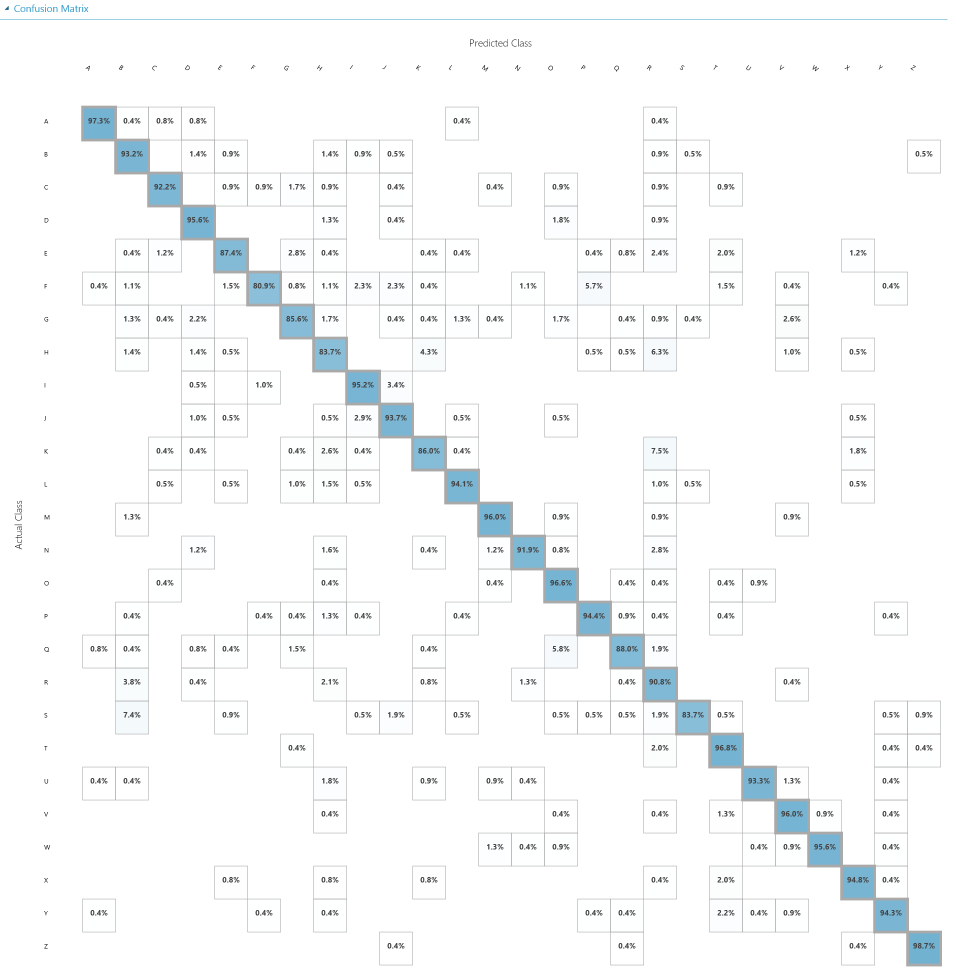
This is the fun part. AML lets us visualize the results of both models. The neural network model has prediction accuracy for each letter that range from 80.9% (F) to 98.7% (Z).

We can see in the result how often letters were mistaken for other letters (5.7% of the time, the model predicted a “P” when the letter was an “F”).
There is too much data to show all of this in a readable format on one screen, but you can see below that AML uses a shaded color scheme to help us visually differentiate between good predictions and bad one. Below, I’m comparing a particularly poor model (the One-vs-all Multiclass) against our neural network model to show these differences.
It turns out our neural network model predicted better than our decision jungle model, so let’s choose that one as we turn our machine learning experiment into a web service.
I like to delete the extra models from my experiment before I turn it into a web service, so let’s go ahead and do that.
Deploying as a Web Service
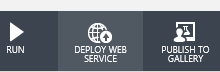
This is the fun and easy part. Run your experiment one more time if you must and then go to the bottom bar and click “Set Up Web Service” and “Predictive Web Service”
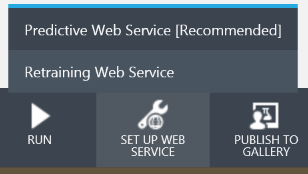
You should see a little animation compiling the experiment into a single node. Then it will create a new workspace for your predictive experiment. The key to this is that it has a “Web service input” and a “Web service output”. Run this experiment (it has to be run and validated before you can deploy it) and click the Deploy Web Service button
When the deploy is complete, AML will take you to a dashboard (#AllTheDashboards) for your web service. Copy down your API key and click on the Request/Response link.
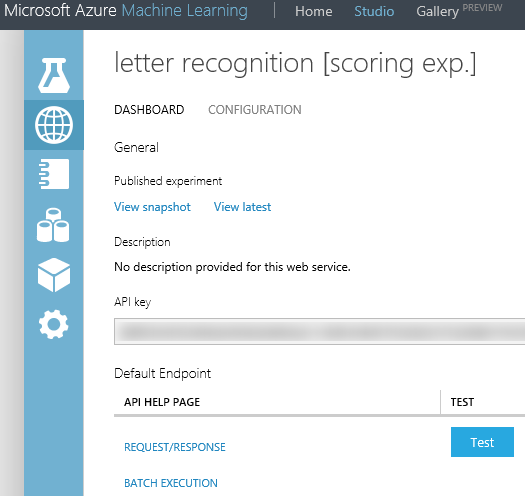
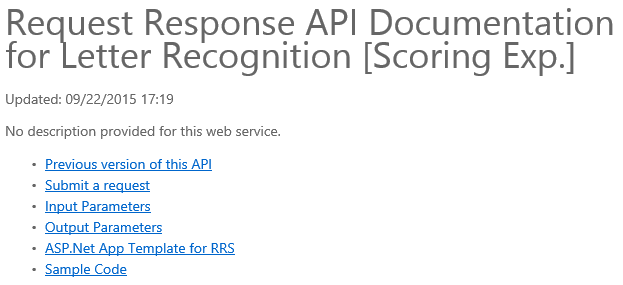
This will take you to my favorite part… auto-generated documentation for your web service including sample code in C#, Python, and R.
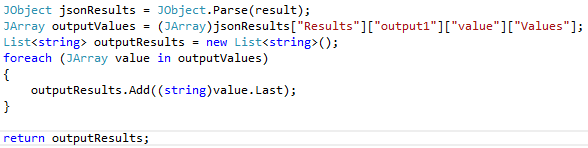
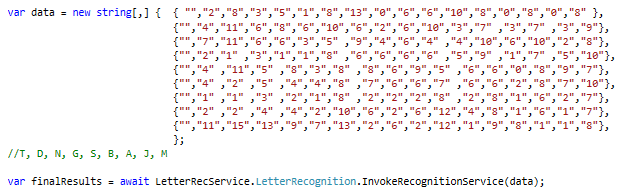
I used the C# code as a jumping point to integrating this service into a Windows 10 UWP app. I made a couple of adjustments that I thought were valuable.
- I changed the InvokeRequestResponseService so that it accepts a String[,] as input and outputs a list of strings. This means we can input a dataset and get the letter predictions back.
- I used JSON.NET to get just the results I wanted (the predicted letters) rather than returning the whole results. I did that by adding the following code in the response.IsSuccessStatusCode if-else:
I’ve made this code available for download below
LetterRecognitionServiceSample
Now all I have to do is input some data that fits my letter recognition format. I’ve removed the first column to show that our service doesn’t need to know what the letter is supposed to be in order to predict it.
I run the application and get the results back and…

Conclusion
Overall, I was very impressed with the AML workflow and service. It was fun and easy to work with and experiment on. I am, in my heart, someone who loves to make things, so the fact that AML make it incredibly easy to externalize these experiment into something my apps can consume makes me very excited. I’m looking forward to playing with more data in AML in the coming weeks.