Note: This is part of a series on writing Alexa Skills in C#, but the Skill setup information is universal & language agnostic (as long as you’re using Amazon Lambda).
So we’ve set up our AWS account for Visual Studio, and written up our Alexa skill in C#. Time to deploy and start testing!
Right-click on your project and click Publish to AWS Lambda

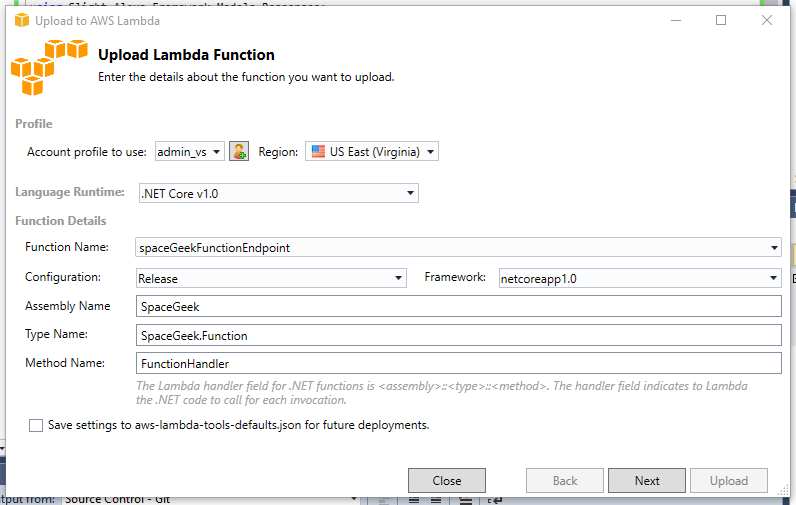
This will open the upload wizard. Everything should be set to your default account and you should just have to name your function. Do that and press Next
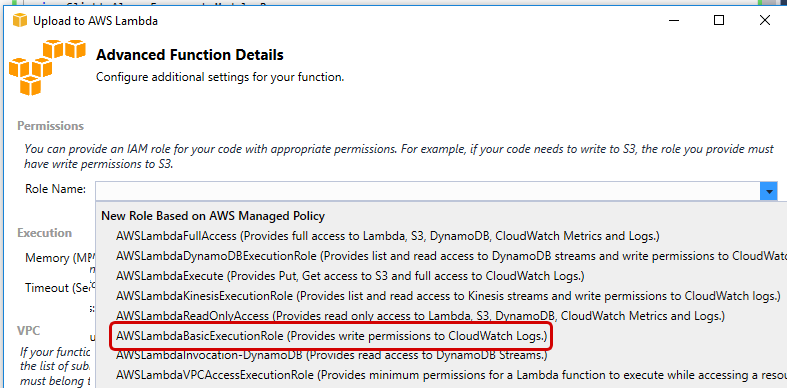
You’ll get the Advanced Function Details page. Click on the Role Name drop-down and select AWSLambdaBasicExecutionRole from the list.
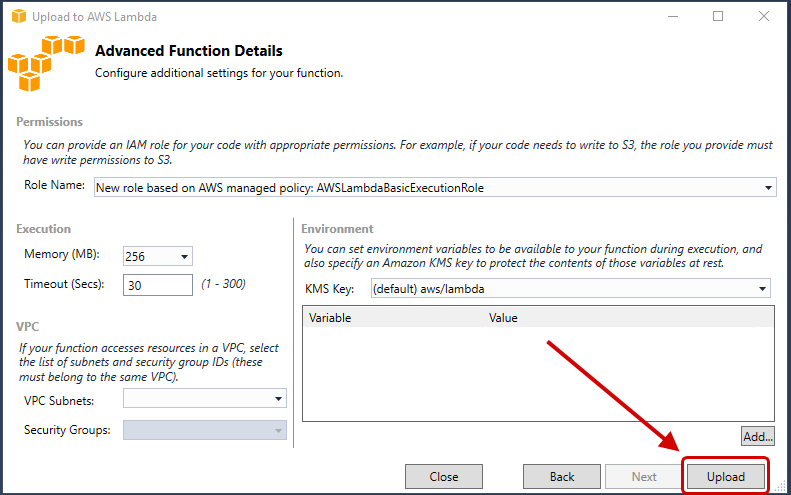
You’re ready to go! Click Upload
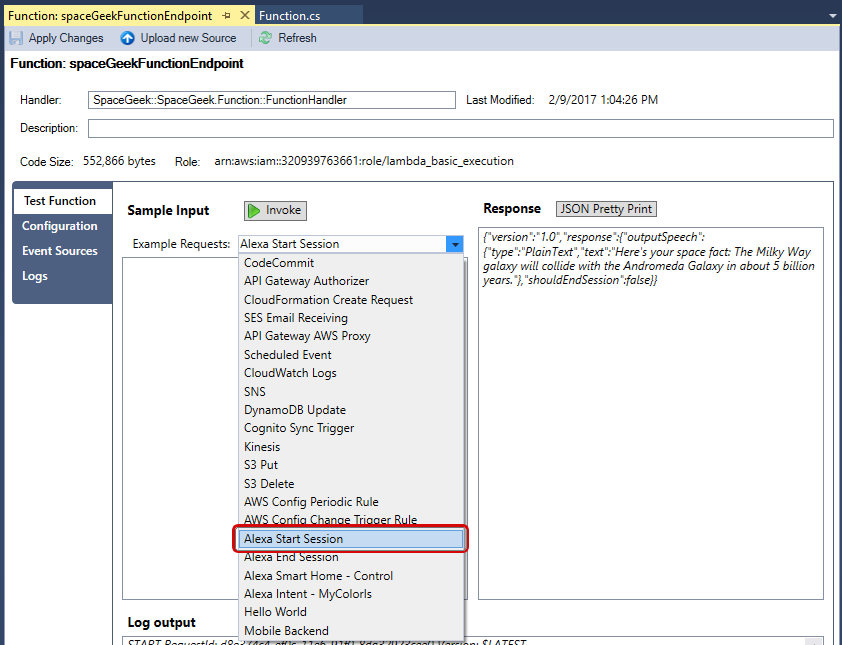
 When the upload is done, you should see the Lambda testing screen. Here you can send sample JSON payloads to your endpoint and see how it responds (and read the resulting log). It’s pretty cool.
Click on the Example Request drop-drown and select Alexa Start Session.
This will insert the equivalent code for “Alexa open [your skill name]”. Click Invoke to see how your skill responds to it.
You can test your intents here. Here is a sample JSON for our GetNewFactIntent to paste into the input to start testing your skill.
{
  "session": {
    "new": false,
    "sessionId": "session1234",
    "attributes": {},
    "user": {
      "userId": null
    },
    "application": {
      "applicationId": "amzn1.echo-sdk-ams.app.[unique-value-here]"
    }
  },
  "version": "1.0",
  "request": {
    "intent": {
      "slots": {
      },
      "name": "GetNewFactIntent"
    },
    "type": "IntentRequest",
    "requestId": "request5678"
  }
}
Test on Your Device
But you don’t care about this. You want to talk to your Echo (or Dot or Tap)!
First, we need to set up our deployed Lambda so that it can be triggered by Alexa. So go to your AWS dashboard and open up the Lambda service section (you can type Lambda into the search box to get there quickly).
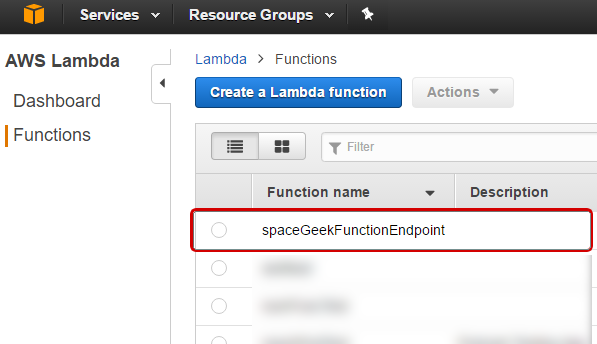
Click on Functions and select the function your just uploaded.
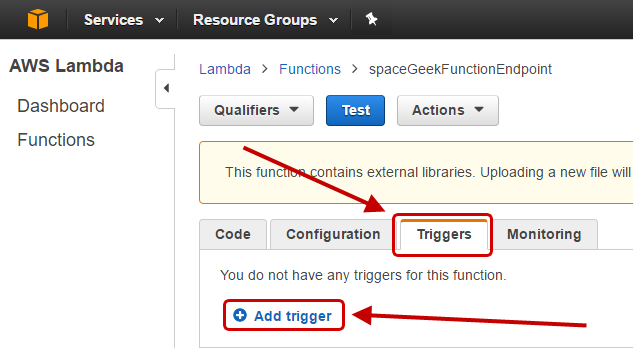
Click on the Triggers tab and click Add Trigger
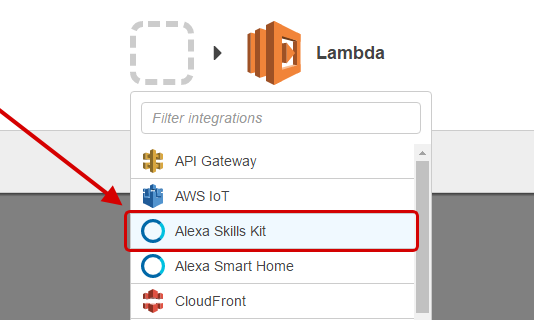
Click on the dotted box and select Alexa Skills Kit from the drop-down
Now your Triggers tab should look like this and your skill should be ready to go.

Keep this window open, we’ll need it in a moment.
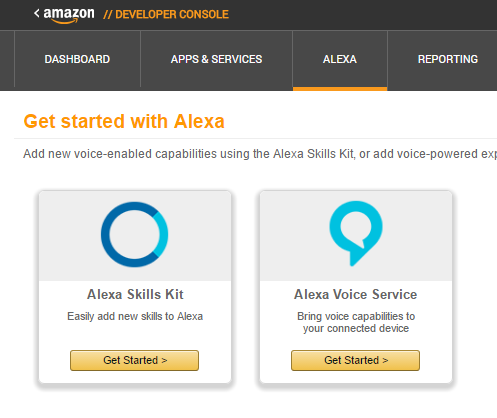
Go to your Amazon Developer Dashboard and click on the Alexa tab at the top. Under Alexa Skills Kit, click Get Started
Click Add a New Skill and you’ll get to the Alexa Skill wizard. Give your skill a Name and an Invocation Name (what users will say to open your skill) and click Next
Now we have to add a schema to describe what intents our skill is going to support. Paste the following into that box.
{
  "intents": [
    { "intent": "GetNewFactIntent"},
    { "intent": "GetFactIntent" },
    { "intent": "AMAZON.HelpIntent" },
    { "intent": "AMAZON.StopIntent" },
    { "intent": "AMAZON.CancelIntent" }
  ]
}
Now we need some samples of utterances that are going to trigger the different intents. When you write this, imagine talking to your device, saying:
“Alexa ask [invocation name] for [sample utterance]”
Or, once the app is open, simply saying the sample utterance. For now, you can paste the following utterances.
GetFactIntent give me a space fact
GetFactIntent tell me a space fact
GetFactIntent give me a fact
GetFactIntent tell me a fact
GetFactIntent tell me something

GetNewFactIntent tell me a new fact
GetNewFactIntent tell me another fact
GetNewFactIntent tell me something new

AMAZON.StopIntent we're done
AMAZON.StopIntent that is enough
This will sound a bit silly, but you can come up with good utterances by talking to yourself. With your actual voice (not in your head) imagine you’re interacting with your device and see what kinds of requests feel natural.
Click Next and you will get to the Configuration page. Select the AWS Lambda (Amazon Resource Name) radio button and check North America. Now you just need resource to point to. That is the Lambda function we just wrote.
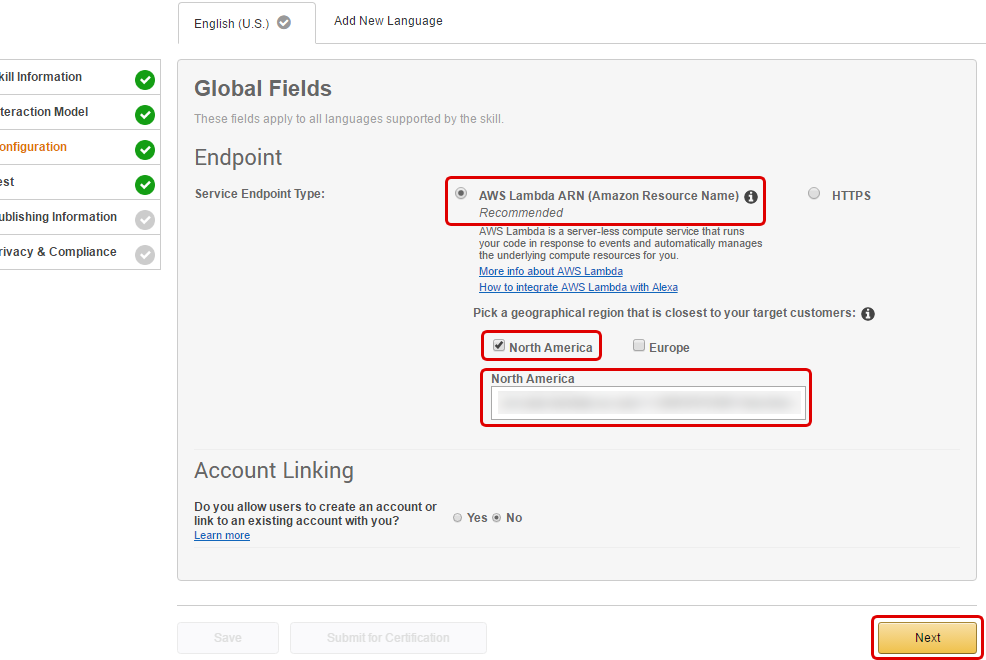
Remember that window for our Lambda function we were keeping open? Go back to that window and copy the ARN for your function…
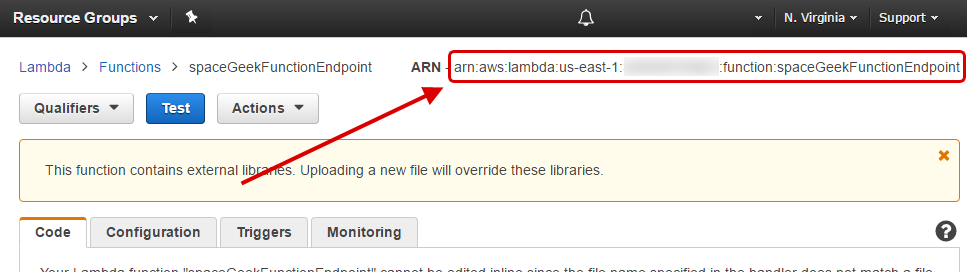
And paste it into the box labeled North America. Now click Next.
And you should be ready to test! If you’re using the same Amazon account for your AWS deployment as you use for your Alexa-enabled device, you should be able to start testing your skill immediately.
There is so much more to learn about Alexa Skills (creating variables with slots, creating audio-enabled skills, smart home skills, decision trees, handling multiple languages) but hopefully this helped you get through some of the basic set-up and deployment do you can extend your skills with ease.
Fantastic tutorial! One of the hardest parts of getting into all of this is really just getting a grasp on AWS configurations and you really covered it all. Thanks!
Great tutorial! Like you said, there’s a lot to learn but this breaks down the biggest hurdle, which is just getting up and running with the basic knowledge to build upon!