OK, so I’ve taken note of multi-point WPF a couple times now (both times were in regards to Rick Barraza’s Cynergy demo) and I started noticing that people are really interested in this. So I decided to take some time to create a couple tutorials on creating multi-point interfaces in WPF.
A point of note: I am not a programmer. I am a designer. This means that whatever code I post will probably be a mess. But it also means that if I can make something work in WPF, anyone can.
The first question we need to address is how to pull multi-point interaction data into your system. You could, of course, buy one of these. I don’t have that kind of money, so I decided to try my hand at the poor man’s multi-point: the ever useful Wiimote controller for the Nintendo Wii.
In this post, we’ll go over how exactly to connect your Wii controller to your computer via Bluetooth. (I’m using Vista. Could be different for XP, but I haven’t tried.)
First, open up your Control Panel and double click on “Bluetooth Devices”
That will bring up your Bluetooth Devices Window. Before we start the Bluetooth discovery process, I want to take note of something. While connecting the Wiimote to your computer may seem like it should be a science, it has in my experience been more of an art. One of the things that I’ve found helps my art is to go to the “Options” tab and check the “Allow Bluetooth devices to find this computer” box:
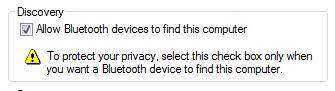
Yes, I am well aware that this is poor security. But it works for me.
Now lets go back to the “Devices” tab and click “Add…” at the bottom and you’ll get started with the “Add Bluetooth Device Wizard”.
Check “My device is set up and ready to be found.”
Now, before you click “Next”, make sure your Wii is either off or out of range of your Wii controller. (If you don’t, it Wii will take control of the Bluetooth signal and your computer won’t be able to find it.)
Press the “1” and “2” buttons simultaneously on your Wii controller. The four lights at the bottom should start flashing in unison.

Now, quickly, press “Next”.
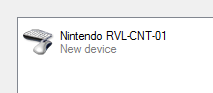
After searching for a little while, you should see “Nintendo RVL-CNT-01” or something similar. Click on it and press “Next”.
In the passkey section, select “Don’t use a passkey”.

At this point, the flashing lights on your Wiimote will stop flashing. As far as I can surmise, this means that your Wiimote is not longer broadcasting. So press the “1” and “2” buttons again and hit “Next”
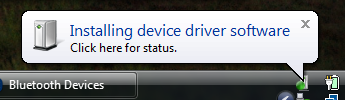
You should get the following message:
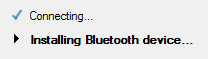
Followed by:
Followed by:
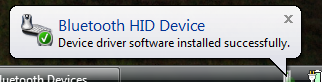
When you see this, you should be golden. Once the computer grabs a hold of the Wiimote Bluetooth signal, it holds on with a vice-like grip. Click on “Finish” in the wizard and close the Bluetooth window.
As a way of double checking your connection status, open up a data visualization application for the Wii controller. My recommendation is my own recently semi-completed WPF Wii Data Visualizer.
Another (more complete) option is Brian Peek’s Managed Library for Nintendo’s Wiimote. We’ll come back to Brian’s work again and again as it is his library that makes everything here possible.
Meanwhile, if this is working for you, check out my next step to WPF multi-point happiness in which we take a closer look at some of the data that comes out of the Wiimote.
A note of encouragement: If your Wii doesn’t work the first time, just try again. My first time, I had to try several times before I could get anything out of my hardware.
As a point of note, the “Wii” is worst name for a game console. Ever. Period.