In this post, you’ll either need to walk through this tutorial on how to call and prepare JSON data gathered from the New York Times API or, if you’re not particularly interested in doing that, you can just download the final project here. This tutorial pretty much assumes that you’re starting from the end of that tutorial.
Fortunately for everyone involved (especially me), this tutorial is much shorter. It is also another in my “without a line of code” series in which you can do everything without even touching the code. Let’s open up our project in Blend and get started. (To see an example what this tutorial makes, scroll to the bottom of this post.)
First of all, I lied. You do have to touch one line of code because you need to get your NYT API key and plug it into the myApiKey variable in the Page constructor (line 26 in the project available for download). The line should look like this:
myApiKey = “&api-key=your_api_key_here”;
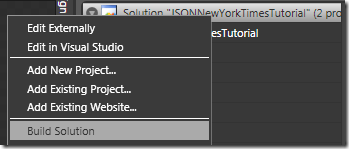
Now, right click on the project solution and select “Build Solution” (in Visual Studio or Blend, it doesn’t matter).
This should build the assemblies so that Blend can do a really neat trick. In the Project tab in Blend, you should see a Data panel in the bottom half. Click on the “+ CLR Object” button.
A pop-up will gently encourage you to name your new data source and choose from a list of available data sources. Select “NYTResult” and hit OK.
You will now have your NYTResult data source show up in your Data pane. Before we start building a nice slick looking interface, select your ListBox (named “ResultsDisplay”) and, in the Properties pane, find the “Display Member Path” and reset it by clicking on the little gray box to the right.
Now, right-click on the ListBox in your “Objects and Timeline” panel and select “Bind ItemsSource to Data…”
Select the data source you just created and select “NYTResult”. Then click on “Define DataTemplate” at the bottom. This will take you to the “Create Data Template” panel, where the fun happens. You will see “New Data Template and Display Fields” automatically selected. We like this. This lets us select all the data we want and give it some basic structure and Blend will do all the bindings for us.
Let’s make a few changes from the standard Data Template setup. Expand the Date field and check Day, DayOfWeek, Month, and Year and change the order with the up and down buttons to something you like. Then, change the Url from “StackPanel” to “TextBlock”. I reordered the data a little bit, so my template looks like this:
Hit OK. The point of that whole exercise was so that Blend would build our data template for us. We don’t actually want the data source and we don’t want our ListBox bound to it. So reset the “ItemSource” property on the ListBox and remove the NYTResult data source. If you run the project now, you should get something like this:
At least we’re getting more data now. Doesn’t look that great, but we’re getting there. Go back to your project in Blend and right-click on your ListBox and go to “Edit Other Templates –> Edit Generated Items (ItemTemplate) –> Edit Template”
We’re now in the DataTemplate but we sadly have no visible data, which makes manipulating it a tad difficult. What I have found works best for me is just to build my desired layout with static data and then translate the bindings. (I haven’t mentioned this, but you should be working in Split mode as a general rule, so you should be able to see the bindings in the XAML.)
So… long story short (it’s getting really late here): I changed the layout to replicate the NYT story design… the Title is a hyperlink button that takes us to the full story, followed by a small byline, the beginning of the story and the date on which the story appeared. If you’d like to look at the design itself in more detail, download the project at the end of this post.
I do want to mention one issue… the issue of getting your text to wrap. With my current redesigned DataTemplate, my project looks like this:
It scrolls horizontally to a degree that is certainly unhealthy. What is happening is that the TextBlock in the DataTemplate is making a request for space and when it hits a limit, it will start wrapping. Unfortunately for us, when the ScrollViewer in the ListBox has the HorizontalScrollBarVisibility set to “Auto”, it is telling the TextBlock that it has all the room in the world and that it doesn’t need to wrap. So, let’s just change the HorizontalScrollBarVisibility on the ListBox to “Disabled”.
And we’re done.
You can download the source here
JSON – Silverlight – New York Times Tutorial (Part 2) Project Files
Questions and comments are always welcome.

![clip_image001[5] clip_image001[5]](https://matthiasshapiro.com/wp-content/uploads/2009/02/clip-image0015-thumb1.png)
![clip_image001[7] clip_image001[7]](https://matthiasshapiro.com/wp-content/uploads/2009/02/clip-image0017-thumb1.png)
![clip_image001[13] clip_image001[13]](https://matthiasshapiro.com/wp-content/uploads/2009/02/clip-image00113-thumb1.png)
![clip_image001[9] clip_image001[9]](https://matthiasshapiro.com/wp-content/uploads/2009/02/clip-image0019-thumb1.png)
![clip_image001[15] clip_image001[15]](https://matthiasshapiro.com/wp-content/uploads/2009/02/clip-image00115-thumb1.png)
![clip_image001[17] clip_image001[17]](https://matthiasshapiro.com/wp-content/uploads/2009/02/clip-image00117-thumb.png)
![clip_image001[19] clip_image001[19]](https://matthiasshapiro.com/wp-content/uploads/2009/02/clip-image00119-thumb.png)
![clip_image001[21] clip_image001[21]](https://matthiasshapiro.com/wp-content/uploads/2009/02/clip-image00121-thumb.png)