Fork the Alexa Audio Tutorial in C#
I originally started working with Alexa Skills because I wanted to write an skill to listen to podcasts. That’s how this whole mess started for me. Little did I know exactly how hard this would be.
You can fairly quickly write a simple Skill to do some pretty cool things. But playing audio is tricky because audio skills are required to:
- respond to a lot more built-in intents
- respond appropriately to several audio events
- manage user state across multiple sessions
I originally intended to do a direct port of the Alexa audio sample in node.js. Unfortunately for me, they make use of the Alexa Skills Kit SDK for node.js, which manages things like skill state and persistent data and I simply don’t have a .Net equivalent of that.
But beyond that, I didn’t really like the style of that sample. I wanted a sample that could easily test things like shuffle, looping, and be able to cycle through the events fairly quickly. So instead of using their podcast files, I recorded five 30-second audio files that let you know audibly where in the list you are. I’ve included these files in the speechAssets folder in the repo if you want to use them for testing.
I’m using a simple helper for data persistence and state management that is based on my tutorial for DynamoDB with C# in .Net Core.
OK… Let’s get started.
Setup
If you haven’t already, go through the Alexa AWS setup process I’ve outlined over here. In addition to the admin user (which you need to set up your AWS Toolkit for Visual Studio), create an additional user that has the AmazonDynamoDBFullAccess role.
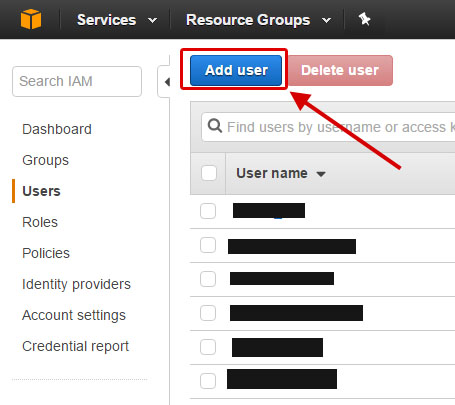
To do this, go to your IAM page and click on Add User.
Name your user (I used AlexaDbUser) and click on the Programmatic access checkbox. Click Next.
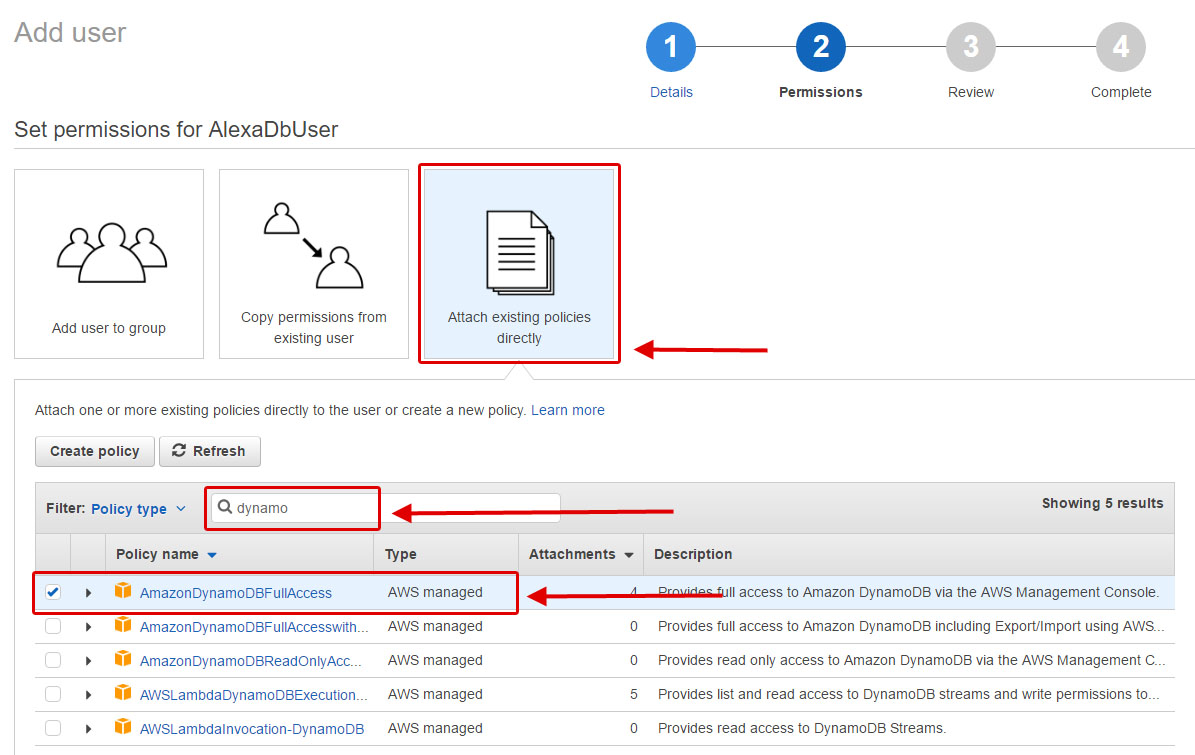
Assign your user permissions to access the database.
Click on the Attach existing policies directly and do a search for dynamo.
Check the AmazonDynamoDBFullAccess box (this gives you read-write and table creation permissions) and click Next.
At the review screen, click Create User.
Now your new role is ready for use. Copy the Access key ID and click Show on the Secret access key and copy that as well.
You could also download this information as a csv.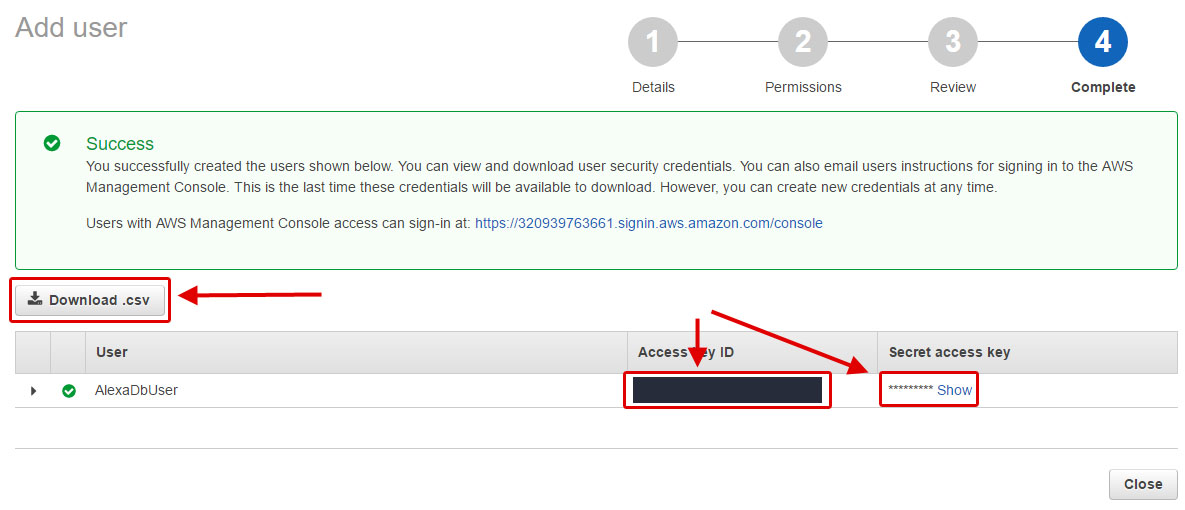
To get this sample to run, you should paste these keys into AudioStateHelper.cs file (which manages the DynamoDb access for this skill).
public class AudioStateHelper
{
    private string accessKey = "[your access key for dynamoDB goes here]";
    private string secretKey = "[your secret key for dynamoDB goes here]";
Code
There’s more code needed for this than we can really walk through in a single tutorial. I’ll do my best to write out the key lines and point to the rest. Here is our outline.
We need to:
- Connect to our DynamoDB and get the latest saved state for our current user
- Determine what kind of request this is. It could be a:
- Launch Request
- Intent Request
- Audio Player Request
- Return a response (if appropriate)
Nuget Packages
- AWSSDK Amazon DynamoDB (“Install-Package AWSSDK.DynamoDBv2”)
- Alexa.NET (version 1.0.0-beta-5 or later) (“Install-Package Alexa.NET -Pre”)
- Json.NET (“Install-Package Newtonsoft.Json”)
Connect to the DynamoDB with a Helper
First we’ll check on our table and initialize a database context. Then we’ll try to pull the last recorded state for that user. We’ll copy that state into a current state, which is what we will change (and ultimately save) as we determine what the next step should be
// initialize a connection to the database
//  this also initialized the context for the DynamoDB helper
var audioStateHelper = new AudioStateHelper();
// this verifies the table exists & creates it if it does not
await audioStateHelper.VerifyTable();

// get the last audio state for this user
var lastState = await audioStateHelper.GetAudioState(input.Session.User.UserId);

var currentState = new AudioState() { UserId = input.Session.User.UserId };

// If there is no record of this user, it's their first time
// initialize a default state for that user
if (lastState == null)
    currentState.State = Constants.SetDefaultState();
else
    currentState.State = lastState.State;
Determine The Request
We can get several request types, but we’ll focus on the launch, intent, and audio player requests. We’ll look specifically for those then cast the requests into those specific types.
if (input.GetRequestType() == typeof(LaunchRequest))
{
    // Give an intro to the skill (output text + reprompt)
}
else if (input.GetRequestType() == typeof(IntentRequest))
{
    var intentRequest = (IntentRequest)input.Request;
    // figure out what kind of intent it is
}
else if (input.GetRequestType() == typeof(AudioPlayerRequest))
{
    var audioRequest = input.Request as AudioPlayerRequest;
    // figure out what kind of audio request it is
}
Now let’s look specifically at responding to those three kinds of requests.
Launch Request
The user has just asked “Alexa, open audio sample” (or something similar). They have not directed our skill to do anything specific. So we should respond with simple instructions on how to use the skill. Keep this short and clean. This code goes in the LaunchRequest section above.
var output = new PlainTextOutputSpeech()
    {
        Text = "Welcome to the Alexa audio sample. "
        + "You can say, play the audio, to begin."
    };
var reprompt = new Reprompt()
    {
        OutputSpeech = new PlainTextOutputSpeech()
            {
                Text = "You can say, play the audio, to begin."
            }
    };
returnResponse = ResponseBuilder.Ask(output, reprompt);
Intent Request
The user may have triggered our skill’s custom intent by saying “Alexa, tell audio sample to play the audio” or one of Amazon’s default intents (“Alexa, pause” or “Alexa, cancel”). A good audio skill needs to be able to handle several of these built-in intents.
We’ll look for our custom intent (PlayAudio) as well as Amazon’s built-in intents for cancel, help, next, previous, repeat, start over, stop, resume, and pause. This code goes in the IntentRequest section above.
var intentRequest = (IntentRequest)input.Request;
// figure out what kind of intent it is
switch (intentRequest.Intent.Name)
{
    case "PlayAudio":
        // either start at the beginning or start
        //  at the last saved place
        break;
    case BuiltInIntent.Cancel:
        // stop the audio, save the file info & location
        break;
    case BuiltInIntent.Help:
        // outputText giving usage instructions
        break;
    case BuiltInIntent.Next:
        // read the current index, increment it,
        //  send play directive to play the new file
        break;
    case BuiltInIntent.Previous:
        // read the current index, decrement it,
        //  send play directive to play the new file
        break;
    case BuiltInIntent.Repeat:
        // read the current index, send play directive to play
        //  that file, starting at 0 milliseconds
        break;
    case BuiltInIntent.StartOver:
        // read the current index, send play directive to play
        //  that file, starting at 0 milliseconds
        break;
    case BuiltInIntent.Stop:
        // stop the audio, save the file info & location
        break;
    case BuiltInIntent.Resume:
        // read the last index and the last position
        //  & start playing from there
        break;
    case BuiltInIntent.Pause:
        // stop the audio, save the file info & location
        break;
    default:
        // unknow intent, panic,
        //  light things on fire, dig fallout shelter
        break;
}
Audio Requests
Audio requests let us know that something has happened with the audio. It could have started, finished on its own or been stopped by the user, or maybe it failed to play. There’s also an audio request called PlaybackNearlyFinished that lets us queue up the next audio item so it can start buffering to begin playback as soon as this item finishes.
Each audio request requires a certain kind of response. This code goes in the “AudioPlayerRequest” section above.
var audioRequest = input.Request as AudioPlayerRequest;

if (audioRequest.AudioRequestType == AudioRequestType.PlaybackStarted)
    // send a response to clear the queue
else if (audioRequest.AudioRequestType == AudioRequestType.PlaybackFinished)
    // send a response to clear the queue
else if (audioRequest.AudioRequestType == AudioRequestType.PlaybackStopped)
    // could be due to a pause, stop, or cancel
    // save the current file and the offsetInMilliseconds
else if (audioRequest.AudioRequestType == AudioRequestType.PlaybackNearlyFinished)
    // send a play directive, queueing up the next audio item
else if (audioRequest.AudioRequestType == AudioRequestType.PlaybackFailed)
    // something bad happened. Record it & find a graceful failure solution
Saving the User State
Let’s say the user has said “Alexa, use audio sample to play the audio”. This triggers our PlayAudio intent and we’ll want to 1) respond with a directive to play our audio and 2) save the user state. In the “PlayAudio” case listed above, add the following code
currentState.State.Token = audioItems.FirstOrDefault().Title;
currentState.State.State = "PLAY_MODE";
currentState.State.playOrder = new List<int> { 0, 1, 2, 3, 4 };
returnResponse = ResponseBuilder.AudioPlayerPlay(
    PlayBehavior.ReplaceAll,
    audioItems[currentState.State.Index].Url,
    currentState.State.Token);
There is a lot more code in the sample for how you should play audio, stop it, queue up a new item or clear the queue. Please look through it on github, because we’re going to move ahead to the deployment process.
Deployment
I cover the bulk of how to deploy to Amazon Lambda from Visual Studio in another post, so we’ll look only at the process that is unique to this skill.
Intent Schema
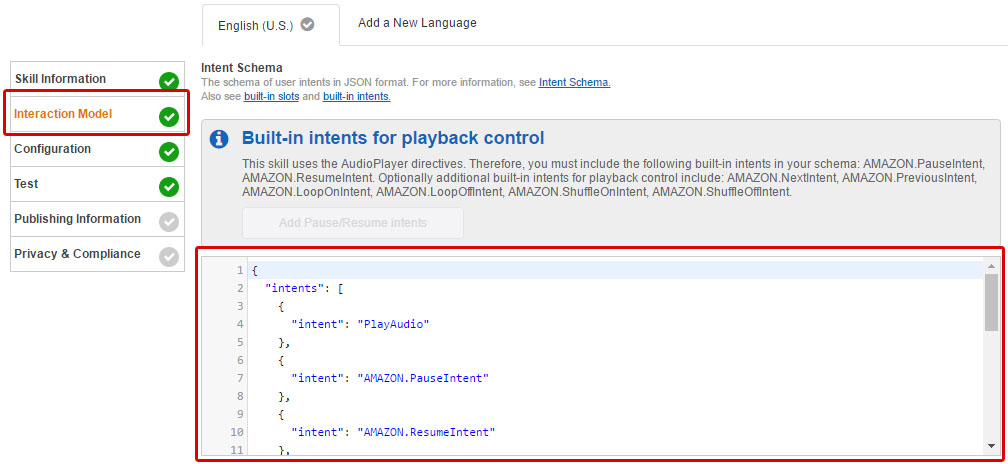
The intent schema for an audio skill requires more of the built-in AMAZON intents than a non-audio skill. The intent schema is a json object that defines which intents can be triggered in your skill. It is common practice to include an IntentSchema.json file in a speechAssets folder at the root of a project (so that’s what I did!)
Just copy and paste the json from that file into the Built-In-Intents textbox in the Interaction Model portion of the Skill deployment in the Alexa Developer Portal.
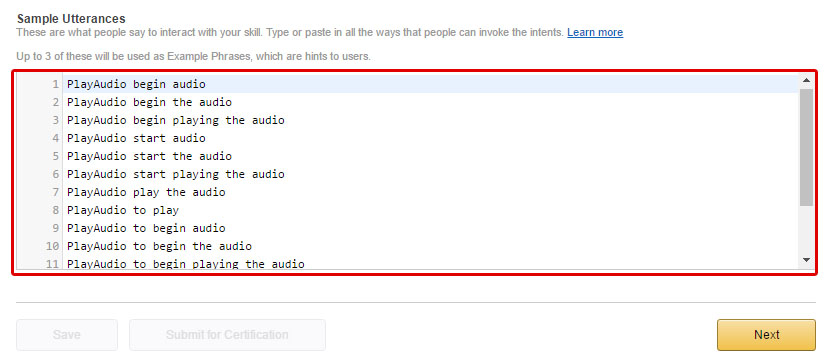
Utterances
Utterances are a way of mapping specific phrases to the intents that Alexa will call. It’s become a common practice to save all the possible phrase permutations and which intents they will trigger into an Utterances.txt file that is saved in speechAssets folder.
Copy and paste the utterances into the Sample Utterances textbox
Audio Files
One thing that I thought was missing from the node.js sample was the fact that the audio files were so long, it could be hard to test events like PlaybackNearlyFinished or PlaybackFinished. It would also be hard to test looping, shuffle, or verify clearly if Next or Previous are working. So I recorded five 30 second audio files and added them to the assets folder.
Each file begins with an audible indication of which file it is (“This is the first of a set of five audio files”) along with a 25 second sample of Bach.
If possible, please host these files on your own server and change the urls in the AudioAssets.cs to direct to your hosted files. However, if you’re just getting started, feel free to leave the urls as they are, they should work fine.
Sample Json
Lastly, for the purposes of testing, I’ve included a set of Json files that come from actual requests I’ve run when testing this app on my Dot device. These are helpful if you want to test your Lambda function offline or use the AWS Lambda testing service.
There it is! Please feel free to comment if you have any questions (although I should note I’m having trouble with my WordPress comments getting auto-moderated that I can’t seem to turn off).