The Amazon Echo is amazing and you should have one. Or at least an Amazon Dot, which offers the voice interface of the Echo without the built-in speaker.
I have a whole “voice-interfaces a part of the glorious dawn of ubiquitous computing” thing that sounds best with a couple of beers, but this post is going to be about building the part of that future that utilizes the Alexa voice interface and building it in C#.
The big trick (at least for me) with Alexa skills isn’t actually the programming, it’s the setup and deployment. “Traditional” mobile apps that I’ve been building for the last decade are compiled into app packages, uploaded to a store, and downloaded to a device.
By contrast, Alexa Skills live entirely as a web service. They are “installed” through your Amazon account, which interfaces with them through JSON request/response. This means they can be built in any language that can act as a web service. But it also means they need to be properly configured. You can host an Alexa Skills endpoint using ASP.NET and write it in C# that way, but for this tutorial we’ll be using Amazon’s Lambda service to host our Alexa Skill.
This tutorial is split into 3 parts:
- Set up an AWS account & Visual Studio for Lambda services
- Write our Alexa Skill in C#
- Deploy our Alexa Skill for testing
AWS Set Up (20-30 minutes)
First, you’ll need to sign up for an AWS account. Go to https://aws.amazon.com/ and click on the “Create an AWS Account” in the top right.
You’ll have to go through the process of setting up an AWS account, which takes 5-10 minutes. For this tutorial, I’m using a personal account (screen 1). Get through payment information (screen 2) and Identity Verification (screen 3). You can pick “Basic” for your Support Plan (screen 4).
Sweet. Now you have an AWS account and you’re ready to do the setup we need to start building our skill.
In the AWS Services at the top of your page, type IAM. This will take you to the Identity and Access Management page. Here we are going to set up:
- A group with admin privileges
- A user profile that we will assign to that group
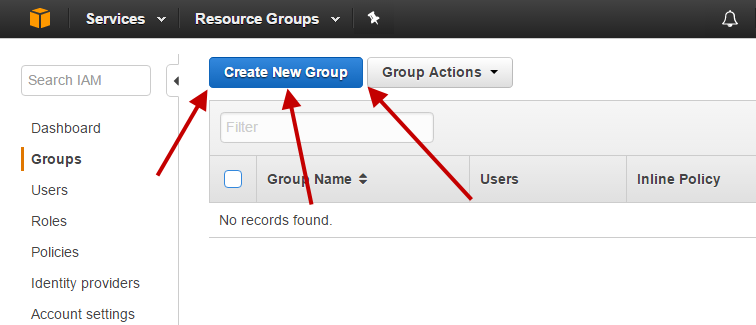
Click on Groups and on Create New Group
Name the group (I called mine “devAdmin” because I’m uncreative) and click “Next Step”. We’re going to give our group AdministratorAccess and click “Next Step”.
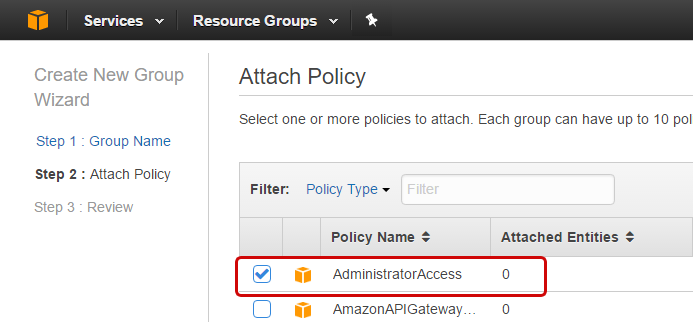
The reason for such a permissive policy is because we’ll be using this access policy in our Visual Studio profile. When we deploy our code, we’ll do so with a more limited role. Click “Create Group” to finalize the group creation.
Now let’s create our user & assign them to this group.
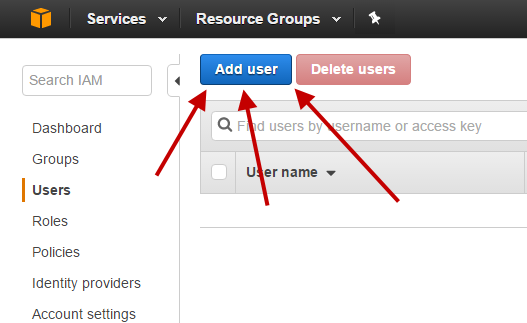
Click Users and click the Add user button
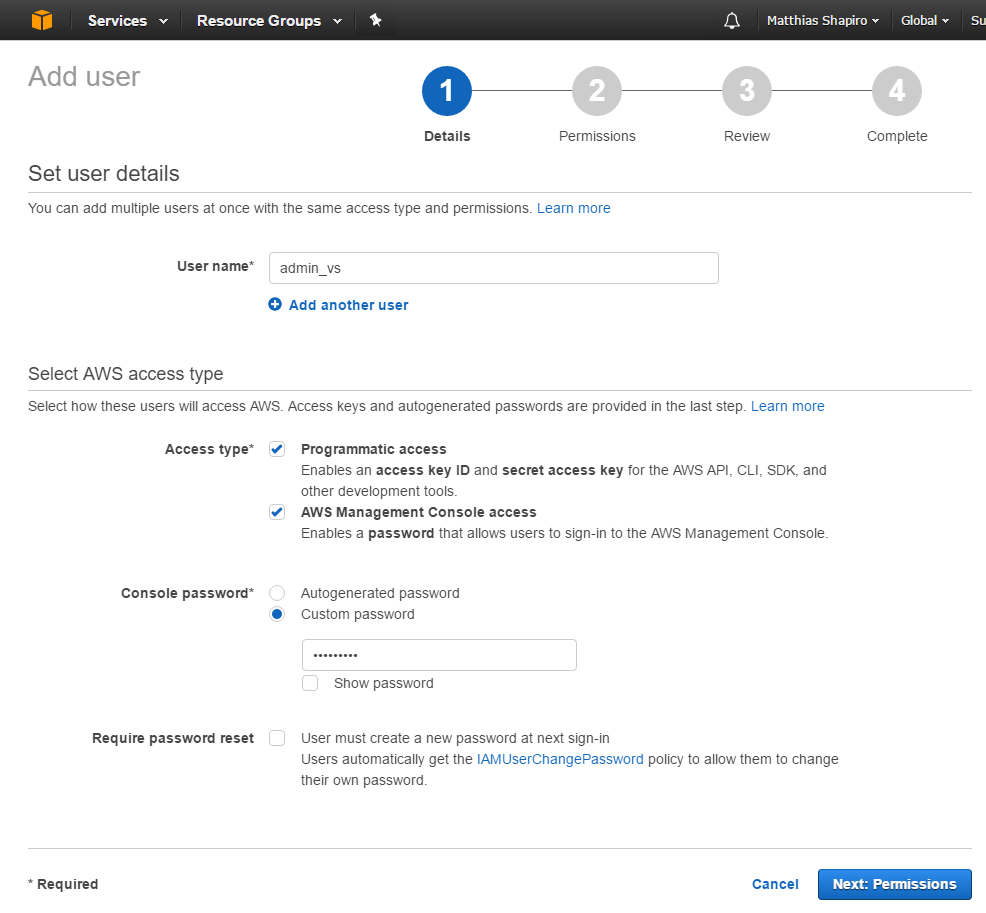
Name your user & give the user programmatic access and AWS Management Console access. Use whatever password policy seem right to you… I used Custom password because I like to get yelled at by security people on Twitter. Click on the button Next:Permissions
Now set the permissions for your user to the group we just created. Click Add user to group and select the devAdmin group. Click the Next: Review button. On the following screen, click the Create user button.
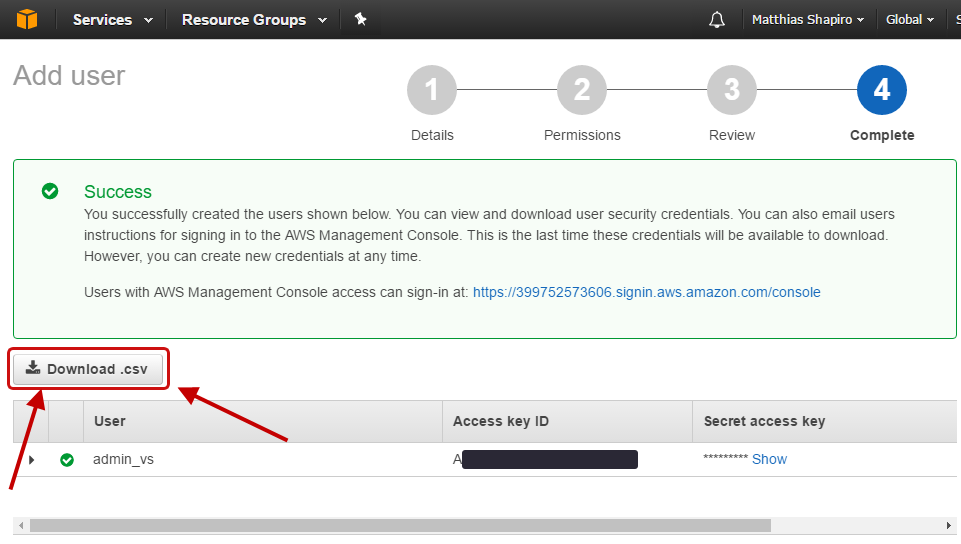
This will take you to a completion page. Download the csv and save it somewhere safe (or save the Secret access key, we’ll need it in the next steps)
Set up Visual Studio (10 minutes)
Now we’ll set up Visual Studio to connect to these accounts. Download the AWS Toolkit for Visual Studio and install it. This will give us templates we will use when we start building our skill, but it will also set up Visual Studio so we can deploy straight to the AWS Lambda service.
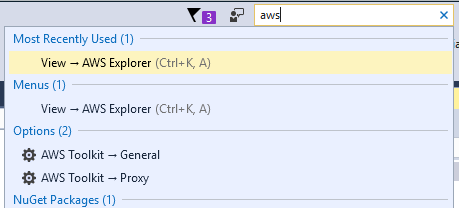
Open up Visual Studio and open the AWS Explorer. You can do this by typing “aws” into the search box at the top right.
Click the New Account Profile button
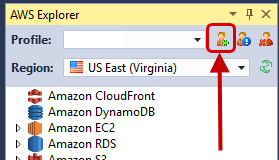
and you’ll get the New Account Profile pop-up. Open up that credentials file you downloaded when you created your user. Name your profile and transfer the Access Key and the Secret Access Key into the appropriate boxes. Your Account Number is the 12 digit number at the beginning of the Console login link
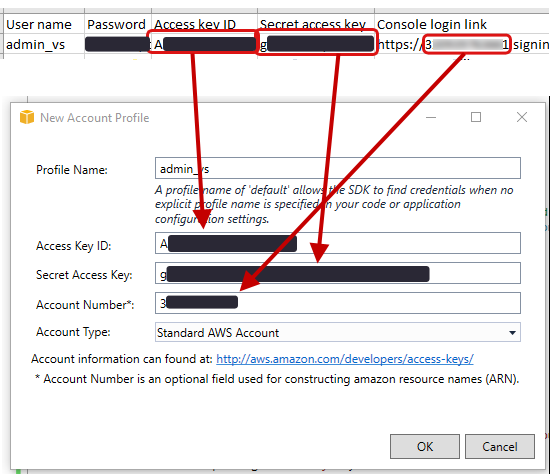
Hit OK and you should be logged in. Make sure your region is set to Virginia (as of this writing, this is the only region that supports Alexa skills) and you should have an AWS Explorer window that looks something like this:
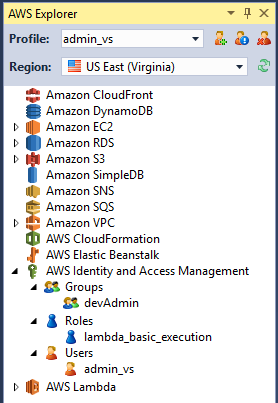
We’re done with setup for now and we’re ready to start writing our Alexa Skill.
Write a simple Alexa skill.